REVIEW: Zoeva Rose Golden Palette

IMG_4680

Today’s post is a review-style one, more specific than other posts maybe. The brand in the spotlight today? Zoeva. In particular their famous eyeshadow palettes. A few months ago I decided to have a little Beauty Bay splurge as I had some money spare for once in my life. Among my order was two Zoeva brushes – the 102 Silk finish brush and 110 Face Shape brush (both of which I adore) – and the Rose Golden eyeshadow palette. Although the Cocoa Blend palette is the most well-known out of the collection, I decided that Rose Golden was much more suited to my super fair skin tone. Take a look at the swatches below… From top to bottom: Wonder full, Harmony, Golden Rule, Just a Rose, Foil, Rusty Petals, Shining Bright, Copper is King, Reflective Elegance, Luster.

Okay, onto the technicalities… The first thing I noticed when using this palette was the AMAZING, total lack of product fall-out that normally occurs with eyeshadows (cough, Urban Decay, cough). Seriously, these shadows are so creamy that, even when swatching, absolutely no product was left sitting around in the pan. Also, the pigmentation is definitely on par with that of Too Faced shadows – except for the mattes, unfortunately. I find that the shimmer shades in the Zoeva palette are much more pigmented than that matte shades like Luster and Harmony, which is a bit of a shame really.The lasting power of these is also very similar to that of the Too Faced shadows (MAC, Clinque, Chanel and Urban Decay come nowhere near in my opinion). Overall, this palette is right up there when I’m creating a party look, but I prefer a matte option for daytime wear, and Too Faced Natural Eyes  (£27.00) is the one for that. I would highly recommend Zoeva palettes for the shimmer shades and I’d love to try some more out soon! Let’s take a peek at the ‘Rose Gold’ look I created…

Sooo, here it is! A vibrant, bronzed, spring-inspired look using my Zoeva palette (£18.00) to create a co-ordinating eye and lip. If you’re fair skinned, coral blusher is your best friend this spring – maybe try Benefit Rockateur? Anyways… if you’d like to know what I used to create this look, read on!

IMG_4728

Tools: Zoeva Face Shape Brush (£11.00), Zoeva Silk Finish Brush (£13.00), Luxie Large Angled Face Brush ($16.00), MAC Duo Fibre Tapered Blending Brush (£23), Real Techniques: Miracle Complexion Sponge (£5.99), Starter Set (£20.99), Sculpting Brush (£9.99), Core Collection (£21.99), Deluxe Gift Set (£29.99).

Base: Body Shop Oils of Life Facial Oil (£28.00), Emité Diamond Heart Primer (£25.90), by Terry Sheer Expert in 02 (£45.00), MAC Pro Longwear Concealer in NW15 (£17.50), Maybelline Fit Me Concealer in 15 (£5.99).

Face: Laura Mercier Invisible Pressed Setting Powder (£26.00), NYX HD Blush in Taupe (£7.99), Shiseido Bronzer in Light (£34.00), Rosie for Autograph Cream Blush in Camisole (£14.00), Benefit Rockateur (£23.50), Collection Speedy Highlighter in Pearl Sheen (£3.99) and Benefit Highbeam (£19.50).

Eyes: Maybelline Color Tattoo in Creme de Rose (£4.99) as a primer, Luster as a base, Just A Rose all over the lids, Rusty Petals in the crease and Reflective Elegance to highlight the centre of the lid. Benefit Rollerlash (£19.50), L’Oreal Super Slim Eyeliner (£6.99),  Anastasia Beverly Hills Brow Wiz (£15.50) in Caramel.

Lips: MAC Subculture lipliner (£12.50), MAC Modesty (£15.50) mixed with MAC Gossamer Wing (£15.50).


What do you think of this palette? Are there any other palettes/shadows you’d like me to review? Let me know!

Emilia x


Benefit Minis: The Review

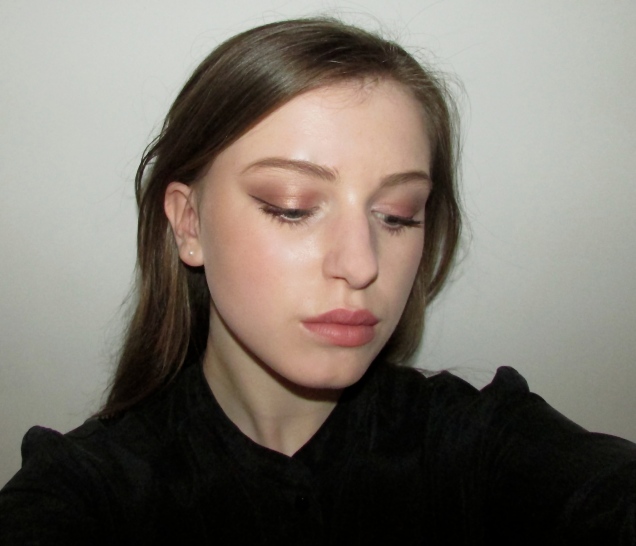
Back in the wonderfully-festive month of December, I received the aptly-named and quickly sold-out Benefit ‘Party-Poppers’ (£34.50) advent calendar. My mum decided, on impulse, that it would be a suitable thing to motivate me through my mocks and BOY was that a good decision. Normally, surprises can leave me feeling a little “Ohhh, that’s lovely…”- that feeling when you unwrap your fifth pair of fluffy socks on Christmas Morning, but this one I was truly excited about. 12 mini Benefit staples all for me to test out! Along with this, on Christmas morning, I was given the most adorable set of Benefit skincare minis (£18); and, what is a girl to do with a whole bunch of high-end minis? Test them out and blog about them of course!


BADGal Lash (£17.50) 6/10- A tapered, oversized wand with jet black mascara that’s intended for utmost volume. Benefit describe it as “brush-on falsies” and, well they don’t lie… really. It does give ridiculous volume, but wire mascara wands aren’t really for me; I find them way too clumpy – I’m a ‘definition’ kinda girl. So, not really my favourite mascara ever and I don’t think it’s worth the splurge, you may as well buy something like Soap and Glory Thick and Fast (£10) or Revlon Ultra Volume (£9.99) (part of their new ‘tailored-to-your-needs’ collection).

Highbeam Highlighter (£19.50) 9/10 – I genuinely love this liquid highlighter (the best of those I’ve tried so far); it gives a really natural highlight whether you’re wearing makeup or not, and is super easy to use. The only downside to this product is that it becomes pretty difficult to blend pretty quickly – it’s definitely a ‘bit-at-a-time’ application process, but using a brush like Real Techniques Expert Face Brush (£9.99). If you’re interested in seeing a swatch of this or Watts Up (soon to come), take a look at my post on my highlight collection.

Hoola Lipgloss and Sugarbomb Lipgloss (£14.50) 8/10 – Pretty damn expensive for a lipgloss in my opinion, although no different to the prices of other luxury cosmetics. Hoola and Sugarbomb are part of Benefit’s complimenting blush/bronzer and gloss collection, which is a wonderful idea. Both the most moisturising, least sticky lip glosses I’ve ever tried, however, I’m a bigger fan of Hoola due to it’s natural, nude tone. See it here in my Nudes and Corals post.

Rockateur Blush (£23.50) 7/10 – At a first glance this is a bit overly pink for me, but actually, when applied this is a lovely natural blush tone. I love wearing this to give my face some depth when I’m wearing minimal make-up, but it’s definitely not a long-lasting blush. Well, not compared to my crazy-pigmented Emite blush (€19) anyway!

POREfessional Primer (£24.50) 8/10 – Okay, fair dues, this works. Very well indeed. Any open pores are concealed instantly, but this primer is one of the balm-formulas that I, personally, really dislike the feel of. They make my skin feel a little grubby, to be honest, not what you want right before applying makeup. Instead, I highly recommend No7 Stay Perfect Shine Free Primer (£12.50), as it does a similar job.

They’re Real Tinted Lash Primer (£18.50) 10/10 – I absolutely adore this; it came free from an ELLE magazine a few months ago and I’ve literally used it every day since. Designed as the perfect base coat for They’re Real Mascara (£19.50) (the wand is identical), but I prefer it as a stand-alone product. This brown-toned primer creates gorgeously defined and natural lashes – it looks like you’ve had a real eyelash tint! By far my favourite Benefit mini from this collection.

Lollitint Lip and Cheek Tint (£24.50) 4/10 – Now, I’ve never used a liquid blush/cheek tint previously, so I could have been using this totally wrong, but somehow I don’t think so. According to Benefit, this is ‘build-able’ – I couldn’t disagree more. I applied a teeny bit of this product to the apples of my cheeks and immediately went to buff it out with my Expert Face Brush (£9.99), but it had stained already and become completely unblendable in a matter of seconds! It’s fair to say I looked like a genuine clown. Cream blushes like Rosie HW’s new English Rose Flush Cream Blush (£14) or Bourjois’ Blush Exclusif (£7.99) are much easier to use.

Watts Up Highlighter (£24.50) 7/10 – I ended up giving this away to one of my close friends, as she wanted to try it out before purchasing the full-sized product. It’s truly golden and has great pigmentation, but, unfortunately, it’s just the wrong shade for my ghostly complexion. Relatively easy to blend, but overall, not a stunner.

Ooh-la Lift Under Eye Brightener (£17.50) 9/10 – Admittedly, to begin with, I thought this product was a rather expensive and unnecessary addition to a make-up routine. Surprisingly, I couldn’t have been more wrong; Ooh-la Lift is subtle, but build able and is my secret to looking awake when I feel dead inside. Pinkish tones brighten up the under eye, and with a little Maybelline Fit Me (£5.99) or another creamy concealer over the top, you’re good to go.

They’re Real Mascara (£19.50) 9/10 – Almost as loved as the lash primer, but Benefit Rollerlash  (£19.50) remains my go-to mascara – nothing quite matches it’s defining and curling powers. They’re Real is just as defining and has a plastic wand too, although it’s more a length than a curl type of product. It depends what you want from a mascara really.

Total Moisture Facial Cream (£29.50) 9/10 – First of all, this smells absolutely gorgeous, as does the whole b.right range, however, it also has unbeaten moisturising powers. A thick, creamy moisturiser, it’s just the right amount of nourishment to keep winter dryness at bay without causing an outbreak of spots. This is the perfect cream to add to a night-time routine, but if you struggle with oiliness, pick an oil-free cream like Clarins Hydra-Matte Lotion (£28.00).

It’s Potent! Eye Cream (£25.50) 7/10 – Yep, it’s more nourishing than the facial cream, but it stings my super-sensitive skin (which is odd as none of the rest of this range does). I’ve tried much more soothing eye creams in the past, like Clinique All About Eyes (£26.50), for example, so I really don’t think this product is anything special.

Foamingly Clean Face Wash (£17.50) 8/10 – Again, a lovely scent, this creamy wash is perfect for removing all daily-dirt or even makeup. Although it’s not specifically targeted towards a certain skin type, every who tries it seems to love it, just like Liz Earle Cleanse and Polish (£9.75). Creamy cleansers are generally best for dry skin, though.

Instant Comeback Facial Serum 6/10 – Whilst this doesn’t cause terrible breakouts or reactions and feels a little refreshing, it doesn’t really do anything in the long term. Clarins’ Mission Perfection Serum (£53) and the likes may be more expensive, but they do have an effect, so they’re far more worth it in my opinion.

Triple Performing Facial Emulsion Oil-free Moisturiser 7/10 – I’ve tried a few oil-free moisturisers throughout my teenage years to try and keep the oily parts of my combination skin at bay. Clarins and Clinique have proved to be the best so far and this just comes nowhere near them – also, it’s a total pain-in-the-arse to get out of the bottle.


What are your favourite Benefit products? Are there any that you’d love to try? Let me know in the comments below!

Emilia x

Nudes and Corals: My Collection

Screen Shot 2016-02-15 at 16.12.23.png

Well, as some of you may have noticed, I have been rather inactive recently. Don’t worry, I have a decent reason. I have no wifi for a month due to moving house. I know right, it’s a surprise I’m not dead yet. Sooo, I’ve resorted to ‘borrowing’ (stealing) my closest friends’ wifi just so I can blog – that’s true friendship.

Anyway, today, I’ve decided to give you a little insight into my lipstick collection, seeing as I may not be active for a little while. Don’t you worry though, there’s a tonne of exciting things coming up – a post on my trip to London Fashion weekend, an interview, a sneak peek of my new house and much more! Keep yourselves updated.


MAC Kinda Sexy

Apparently this is a “neutral pinky rose”, but as you can see, it comes out as a orange-based nude on me. Bought for me along with MAC Liner in Subculture (£12.50) by one of my friends – this was my first MAC lippy and, sure enough, it was the one that made me fall in love. Kinda Sexy is an all-year-round shade.


Teeez Oasis Gem Lipstick

I recieved this in this month’s Glossybox and, to be fair, it isn’t a colour I’d usually choose, but I guess that’s kind of the point of beauty boxes – to get you to experiment. It’s a bold coral shade, which is rather matte without being drying like many of the MAC mattes. This is because it contains a dash of coconut oil. In my opinion, I would look great on either super pale or super dark skin, either way it’s a bold choice.


Rimmel Provocalips in Skinny Dipping 

The most brown-toned I dare to go with my ghostly skin; I’ve tried MAC Yash, which was a similar shade, but it seriously dried out my lips! Whereas this drugstore lifesaver, well it stays on for days without being drying in the slightest. Only £6.99 and available in a multitude of shades, I would highly recommend this for both pigmentation and formula.


MAC Modesty

This is my most recent MAC purchase, I bought this for a deeper winter nude. A rather pinkish nude, similar to MAC Brave – it’s possibly a little too dark for me, although most wintery shades are. Similar to Chanel Rouge Coco in Paradis, but much more moisturising with it’s Cremesheen finish. Unlike Pleasureseeker and Gossamer Wing, Modesty actually stays on.


Benefit Hoola

This is a brown-toned gloss, but it looks extremely natural on me, so I wear it when I need a bit of moisture. This was a mini in my Benefit Party Poppers calendar and I’ve been loving it ever since I got it (way more that it’s sister, Sugarbomb). I don’t know what it is about glosses, but they never ever seem to run out, so this is definitely worth the investment.


MAC Pleasureseeker

Pleasureseeker is a Glaze, which is pretty similar to a Lustre finish; a creamy peach. This was chosen for me by a MAC make-up artist, as a ‘summer-version’ of Kinda Sexy, but, personally I really don’t like it. If my lips were more beige-toned, then maybe it would look a bit better. I’d recommend this for fairer girls who don’t need an ‘all-day’ lipstick, as it only stays for around 2 hours.


MAC Gossamer Wing 

The lightest lipstick I own; a little risky given my ever-so-pale skin, especially seeing as it’s recommend for tanned skin tones. Described as a dirty beige with gold undertones and a Lustre finish, Gossamer Wing is a limited edition lipstick as part of the Faerie Whispers Collection. I definitely wouldn’t wear this if my lips weren’t so naturally pink and the Lustre finish means that it isn’t so long-lasting, so it’s not really a day-to-day choice.


What nude, pink or coral lippies are you loving at the moment? I’d love to hear your recommendations!

Emilia x

REVIEW: Too Faced Natural Eyes Palette

IMG_3935

Recently, on a trip to London, I picked up this palette that I’d been wanting for months; it’s my favourite out of all the Too Faced palettes, as I often like to play it safe with the eyes, using neutral-toned shades. This particular palette is called ‘Natural Eyes’ and just as the name suggests, it’s for ‘my-eyes-but-better’ looks. Too Faced is known for having brilliantly pigmented palettes with creamy, long-lasting formulas and all I can say is that this palette certainly lives up to that reputation. It contains 9 shades, which are split into 3 sections – Day, Classic and Fashion. Me being me, well I decided to mix it up didn’t I? Instructions? Pfft… Make-up is for creativity, not following the rules! The only downside I’ve found to this palette is the price tag – £32, rather normal for high-end beauty brands, but still rather expensive, considering my usual budget. Hey ho, I guess, you have to treat yourself once in a while!

So, below I’ve produced a day-time look for you, using solely this palette for shadow along with some other make-up-drawer staples. Take a look!

Alright, let’s focus on the eyes first. As I mentioned earlier, this taupe-day-look was created using entirely the Too Faced Natural Eyes Palette. The shades I used are indicated above; Heaven, Silk Teddy, Nudie, Cashmere Bunny, Honey Pot and Sexpresso. Nudie was used as a base colour to eliminate any redness or veins trying to make an appearance. Then, I used Cashmere Bunny and Sexpresso to cut the crease and contour the eyes, applying Silk Teddy to the centre of the eyelid afterwards. Finally, Heaven was used to highlight the brow bone and inner eye and Honeypot was gently applied to the lower lash line. I used various brushes from my Real Techniques Starter Set (£21.99) and Real Techniques Deluxe Gift Set (£30) to apply these shades.

After shadow comes liner – I prefer to line my upper lash line with my Rimmel Exaggerate Smoke’n’shine Eye Pencil (£3.99) before creating a wing with L’Oreal SuperLiner Perfect Slim (£6.99). This way I find it much easier to use a pen-style liquid liner without accidentally giving myself wings that cover my entire eyelid. Also, when drawing a wing, I like to start from the tip of the wing and work my way into the inner part of my eye.

Brows? You accustomed followers should know what I swear by by now! First I groomed the brows with Miss Sporty Just Clear Mascara (£2.99), a drugstore lifesaver. It’s basically the same as using a spoolie brush – I’m simply too lazy to buy one. Then, using light and small, hair-like strokes, I filled in my brows with MAC Brow Pencil in Lingering (£14.50). And, finally, I gave my brows another coat of clear mascara afterwards to set them. Although I’ve followed this routine for years, I’d love to hear of any other brow products that may change my ways!

Lastly, for the eyes is mascara, I always apply Benefit They’re Real Tinted Lash Primer  (£18.50) before mascara as it helps to separate the lashes, giving you great definition in the end. This can be used alone, as well, for days when you want a more natural lash, but can’t quite face going bare. Afterwards, I wiggled a little Benefit Rollerlash (£19.50) through my upper lashes (the primer is enough for the bottom lashes) and tah-dah, there you have it, defined, length and curled eyelashes. I recommend conditioning your eyelashes with coconut oil every so often if you’re someone who regularly wears mascara – it will help them to stay strong and increase the rate of growth.

IMG_3929

Now it’s time for the rest of my look, if you’re interested that is…

First up is the base – I used Benefit The Porefessional (£24.50) today as my pores have been particularly large recently, I don’t love the texture of it but it sure does it’s job. On top of this, I applied Charlotte Tilbury Magic Foundation in shade 1 (Fair). I picked up a sample of this whilst I was in London too; I’ve never used CT cosmetics before but from what I gather, everyone seems to love them. The foundation is surprisingly affordable compared to the rest of the range, in my opinion, retailing at £29.50 – I use it for days when I need a little more coverage than usual. Expect a review on this individual product coming soon! Next, I patted MAC Pro-longwear Concealer in NW15 (£17.50) onto areas of particular redness and blemishes and blended it using MAC 287SE brush (£23) and Real Techniques Detailer Brush. After concealer, I dabbed Benefit Ooh La lift (£17.50) on the under eyes to banish puffiness and Benefit High Beam (£19.50) along the top of my cheekbones to add some dimension to my face. This was then set with a light brushing of Laura Mercier Translucent Pressed Setting Powder (£26).

Next, let’s call them ‘face colour’ products. Firstly, I blended a little NYX HD Blush in Taupe (£7.99) just underneath my cheekbones as a subtle contour for my pale skin. Following this came my Emite Artist Colour Powder Blush in 108 (€19). This blush is amazing, it’s incredibly pigmented and it contours as well as adding a healthy flush of colour to the face. Then, just along where Highbeam was applied, I used my Real Techniques Highlighter Brush to apply MAC Mineralize Skinfinish in Soft and Gentle (£24) for a little sparkle.

And finally, the lips, seeing as eyes were neutral, I decided a subtle, but glossy lip colour would be the best option. For this, I used Benefit Hoola Ultra Plush (£14.50).


The Verdict – 9/10

There’s no doubt about it, this palette is better than MAC, Urban Decay and Clinique. I wouldn’t be surprised if it overruled most high-end eyeshadows. The formula for these shadows is truly like no other; they’re buttery but still last the whole day! Very easy to blend too. My only complaint is that the darker shimmery colours, such as Erotica and Chocolate Martini aren’t quite as pigmented as their matte counterparts. However, I would still recommend this to any lover of neutral eyes or even brown-toned smokey eyes. If you’re not willing to spend £32 then I would suggest the Makeup Revolution Redemption Palettes (£4) as a less creamy, less soft and slightly less long-lasting alternative.


There we have it – my review of Natural Eyes! What do you think of this palette? Would you like to see me try any other looks with it? Send me a comment to let me know!

Emilia x

p.s. I am considering purchasing some new eye brushes as I’m not sure my Real Techniques ones give me the best results. My budget is around £40 – what would you guys suggest?

February It List

Ahh, February, that delightful month where absolutely nothing ever seems to happen. Except from rain and the occasional spot of sleet, that is. Everyone’s tired from the few weeks back at work or school, everyones fed up of following their New Years resolutions,  and there’s generally not much happiness brewing around. Do not fear, however, because I am about to tell you all the things that you should be doing this month (instead of miserably staring out of the window). February wil no longer be the month of nothingness. Mark my words.


Too Faced Peanut Butter & Jelly Eyeshadow PaletteToo-Faced-Peanut-Butter-and-Jelly-Palette-Review-2

What could possibly be more exciting that a new Too Faced palette release?! The queens of eyeshadows have treated us to an exciting mix of colour pop and neutrals all in one place and we couldn’t be more grateful. This little beauty is due to be welcomed into the world on the 28th of February in the UK and luckily enough, I’ll be in London all ready to get a glance. Chocolate Bar? Or even Choco-Bonbons? Pfft.. That’s so last year – you’re going to want to get your hands on the latest edition ladies, trust me.


Accentuating the waist

Every little detail in fashion at the minute seems to be heading towards this; using old-style tricks to create the illusion of a thinner waist. Move over ‘over-sized’, no more hiding away – we’re about to show it all off! Wrap coats, high-waisted culottes, belted pinafores, midi-skirts – they’re all in on it. It’s time to create some curves, girls, and below are some suggestions as to how to get started…


The New Pancake

As everyone should be well aware of (if you’re not you’re slightly crazy), next Tuesday is the beloved Pancake Day. I.e. it is law that you eat pancakes all day. (Okay, not quite.) Anyway, this year it’s all about changing it up; try something new, the whole lemon and sugar thing is a getting a little ancient. Chocolate orange, Pear and Maple Syrup, arrot Cake, the list goes on. Find all the best and most invent recipes for this year in the following links!

Red VelvetCarrot CakeLemon and BlueberryGinger BreadBirthdayPeanut Butter CupPear & Whiskey Maple Syrup.


Mini-bags

This season some accessories seem to be growing, whilst others seem to be shrinking; it’s an odd notion. Last month I spoke about big earrings, they’re totally coming back in. Don’t be afraid to let your ears take centre stage! But, on the other hand, bags are one of the ‘shrinkers’. Mini-backpacks, mini-satchels, mini-duffels, they’re everywhere! Long gone are the days of the Mary-Poppins-style shopper, from now on there’s only space for your phone, a cardholder and, of course, a lippy. Unsure on how you could channel this trend? Just take a peek at the ideas below..


Love Me Beauty boxes

Upon receiving this month’s Elle magazine, as I opened the pages, as always, a multitude of leaflets fell out. Usually they’re the same sort of promotional thing, as Elle tend to keep the same partners, but this month, a new slip of card fell out! This was advertising yet another ‘beauty box’ brand on the market called ‘Love Me Beauty’ and, what’s better, you can get your first month for just £1 with Elle! £45 worth of beauty products for £1, you’d be insane not to buy one. Of course I’ve already gone ahead and ordered one, woopsy… Expect a review coming soon!


Oxford Circus Topshop Store

Despite having been to London countless times in recent years, for some reason, I’d managed to never ever set foot in the flagship Topshop store! It’s almost an offence. So, this month, for the first time ever, I paid this shop a visit (a 2-hour long visit, as it happens), when I went to London with three close friends. And, oh my, it was amazing. A nail bar, a hair salon, a smoothie bar, a fro-yo bar, Brandy Melville and many beauty brands from abroad too – all in one store! It is truly shopping heaven – if you haven’t been you should put it straight on your to-do list for 2016.


Cocoon Coats

Here in the UK, it usually isn’t worth ditching our coats until at least mid-April, so with the new season stuff in store, there’s a real urge to invest in another new piece ‘just for spring’. If your shopping habits are along the same lines as mine, then you’ve probably already bought yet another coat, but if you’re still deliberating, listen up! The cocoon coat, as it’s so aptly named, will literally cocoon your body, wrapping you up and giving the oversized look that we’re still addicted to in outerwear styles. What’s more? There’s loads of lovely versions of these left over from the Christmas sales! Snatch them up whilst you can.


Spring Cleaningil_fullxfull.636776034_9i5s

Alright, maybe it isn’t the most thrilling thing to do, but on one of the classically drizzly days, I promise you this is one of the best things you can do – you’ll be happy with the results. Whether this means clearing out your wardrobe, make-up collection, skincare, rearranging your bedroom or just giving your make-up brushes a good old clean, it’s refreshing to do something like this once in a while. Now that you’ve cleared out, you could do a car boot, sell on eBay or Depop or even take your stuff to the local charity shop. After all, getting rid of old things can only mean one thing, right? More space for new things!

Glossybox Starter Box: The Review

IMG_3490

Glossybox, as many of you may know, is one of the most popular beauty box subscriptions in the UK. I remember hearing about it a couple of years ago in ELLE when it first started out and literally begging my parents to buy it for me. Unfortunately, they knew that I was still in the “plaster-foundation-all-over-despite-the-fact-that-you-have-perfect-pre-pubecsent-skin” stage, although I didn’t quite understand that this was not the way to apply make-up. They assumed a monthly subscription of luxury makeup would be wasted on my 12-year-old self; and they were probably right. But, now, I guess I’ve proved that my passion for beauty wasn’t just a phase, finally, this Christmas, I recieved a 6 month subscription thanks to my lovely nan! New brands, new types of product; it’s all so exciting – so what better thing to do than do a review for you guys?


Starter Box

A very professional vibe to it; classically pink in colour and decent sized products!

IMG_3529

What products did the box contain?

Royal Apothic Moisturizing Body Crème (£14.50), FULL SIZE Nails Inc Nail Polish in Uptown (£11), FULL SIZE Nicka K Airbrush Blending Sponge (£6.50), FULL SIZE Bellàpierre Mineral Lipstick in Ruby (£20), Emité Diamond Heart Primer (£25.90).


What do Glossybox say?

Royal Apothic Moisturizing Body Crème – a “delicately scented” body moisturiser containing “lactic acid to gently smooth skin” whilst keeping skin “hydrated despite the chilly winter months”.

Nails Inc Nail Polish – A perfect “go-to shade” of “on-trend pink” that will last ages due to it’s “long-lasting formula”.

Nicka K Blending Sponge – Glossybox claim that “this little sponge is all you need to blend your way to a flawlessly fresh face” to create a “streak-free finish”.

Bellàpierre Lipstick – “Including vitamins C and E”, “natural waxes”, “mineral pigments” and “antioxidants”, this “cult American favourite” will give you “long-lasting colour” whilst being completely lip-friendly.

Emité Diamond Heart Primer – A “lightweight formula” of “peachy fluid” for boosting radiance, balancing skin tone and creating a smooth finish.


What do I think?

Royal Apothic Moisturizing Body Crème – In my opinion, this smells of ammonia – sour; not particularly nice, so I didn’t have the best first impression. The packaging is gorgeous and matches the floral scents of the cream – it’s very vintage. As for the actual cream, I can’t say I loved it. It was rather thick and did no more for my skin than your regular Cetaphil moisturiser. Coconut oil did a far better job of rehydrating my skin compared to these two moisturisers anyway.

Nails Inc Nail Polish – I often avoid buying nail polish, simply because I don’t wear it very much due to school and having ridiculously teeny nails, so when I get one, it’s almost always around the £2/£3 mark. Understandably when I recieved one that was worth over £10 (shock horror, I know), it brought a little buzz of luxury. My go-to brand was previously Mavala, they do amazing polishes, but this Nails Inc polish rivals even Mavala! It literally glides on, you only need two coats and it lasts for DAYS. Plus the colour is perfect for winter to spring transitioning – not too dreary, not too bright.

Nicka K Blending Sponge – Receiving this was a bit of a pain in the arse because I’d just recieved two similar Real Techniques complexion sponges for Christmas, but, hey-ho, a beauty addict can never have too many products! So, I decided to give it a whirl and compare it to my other new sponges. Surprisingly, this sponge was no-where near as easy to blend with as the RT counterpart, it was too solid and rough, even when wet, meaning that it was difficult to get an even finish. Overall a bit of a disappointment; Real Techniques sponge works much better.

Bellàpierre Lipstick – One of my blogging goals for 2016 was to grow my lipstick collection, because I only owned around 8, which is unheard of in the beauty blogging world. Well thank you to Glossybox for giving me a kickstart with that one! Just like any other girl, I adore a good red lippy – I probably have around 5 now and I love them all. The colour of this is similar to that of my Ardency Inn lipstick in Lovecat, but it is a little more blue-toned. However, it’s the staying-power of this lipstick that really sets it apart from the rest; it didn’t budge even when I ate an entire curry! Yet, it’s still incredibly moisturising. I’d describe it as the more glossy and flattering sister of MAC Ruby Woo.

Emité Diamond Heart Primer – I only really discovered my love for primers last summer, but since then, I’ve tried out a handful of products and this has truly been the best. I’m not a fan (and neither is my skin) of the plastic-like texture of some primers, like Benefit Porefessional, for example, so the fact that this primer is made to an almost a ‘serum’ formula immediately meant it got the thumbs up. It doesn’t dry my skin out or cause break-outs, if anything it provides the protective prep that my skin needs before I start applying make-up. I’ve had a few comments now on how healthy and glowing my skin looks, so it must really be “illuminating” like Glossybox say! My only dislike is that it does little to control my shine.

Coconut Oil: Fab or Fad?

Over the past few months, I’ve heard endless compliments concerning coconut oil; it’s a skin-saver, hair-saver – you can even cook with it! So, I decided to order myself a free sample from Vita Coco themselves, the biggest high-street supplier of pure coconut oil (find them in Boots) to see if coconut oil really lives up to it’s reputation. P.S. if you love trying new beauty products, I highly recommend that you get yourself subscribed to Magic Freebies, so that you’re the first to know about exclusive health and beauty samples. Anyways, my two little sachets of extra virgin coconut oil arrived a few days later with vouchers (yay!) and ideas as to how to use it. Now, personally, I’m not much of chef; baking is more of my forte. For this reason, I’ve not yet had the chance to test out coconut oil’s power as a healthy-alternative frying agent. Instead, I’ve been focusing on it’s beauty benefits; hair, body, face. So, let’s get started with the reviews!

Hair

As Vita Coco suggests, just before bed I combed a grape-sized dollop of coconut oil through the ends of my dry hair. I then scooped my hair up into a bun and slipped on a hair turban to make sure all the goodness of the oil wasn’t simply transferred to my pillow. When I woke up in the morning, I hopped into the shower and washed out the excess oil with a quick shampoo – no conditioning necessary. Now, usually, without conditioner my hair is effectively a frizz-bomb, hence I was a little skeptical about the whole ‘no conditioner’ thing. However, upon spritzing some Toni and Guy Heat Protecting Spray and drying my hair –  my hair was the glossiest I’ve ever seen it! Not to mention incredibly soft. Admittedly, it stinks of coconut, but for most people that’s no bad thing! Coconut oil worked better for my hair than any expensive, ‘luxury’ oil like Macadamia Oil or Moroccanoil – so my first impression was pretty damn good. Also, it’s supposed to aid hair growth – and what girl doesn’t want that? Let’s see how it compares to my unrivalled Lee Stafford Hair Growth Treatment!

Face

Considering I’ve used oil-free moisturisers for the majority of my teenage years due to oil’s contribution to my spots, I didn’t have particularly high hopes for using pure coconut oil on my face. I simply applied a teeny pea-sized amount of Vita Coco to my palms and smoothed it across my cleansed complexion instead of using a moisturiser before bed. In the morning, my skin did appear a little more shiny that usual, no surprise, but it was dramatically brightened and softer than ever before. It feels like babies’ skin! For people with dry skin problems, I would strongly suggest adding coconut oil to your nightly skincare routine – but for us oily ones out there, it’s maybe a couple-of-times-a-month thing. Again, the outcome was WAY better than expected!

Body

I’ve sworn by Sanex and Cetaphil body washes and moisturisers for the past few years because my skin is soooo crazily sensitive, but recently I’ve tried a couple of new products. In winter my skin really suffers, it becomes  dry and itchy, so as part of my weekly moisture routine, I’ve been using coconut oil after a bath in Bomb Cosmetics Bath Brûlée (they contain shea butter, a moisturising ingredient that soaks into the skin whilst bathing). Honestly, I’ve seen such an improvement in my skin this year – it’s so much more comfortable, it looks and feels like healthy skin should! I know many girls that suffer from dry legs; and this would be the perfect fix for them. I urge you to try it ladies!

Overall, the things I loved the most about the use of coconut oil was it’s incredible softening properties, as well as it’s natural purity – making it ideal for sensitive skin. Other ways to use coconut oil include make-up remover, shaving cream, blending into smoothies for it’s weight-loss assisting properties, natural lip balm, stretch-mark/scar removal, tooth whitener, hair masks, tanning oil, dry feet treatment… The list goes on! I’ll definitely be trying it for some of these uses because the results so far are fab. Well done Vita Coco, you know what, I may just have to #SwearByIt !


Have you tried coconut oil? If so what’s your favourite use for it?Let me know in the comments below!

Emilia x

Highlighters: My Collection

Todays post, as you’ve probably gathered from the say-it-as-it-is title is all about my highlighter collection. Now, over the past few months, my collection has been growing rapidly – 5 of one type of product is a lot for my budget! However, recently, as I’m slowing falling into the depths of cosmetic addiction, I decided to splash the cash on MAC Mineralize Skinfinish in Soft and Gentle (see my post on it here). The MUA Undress Your Skin Highlighter was my first highlighter, at only £3, as I’ve mentioned previously, I’m often dubious about certain new products, like primers and highlighters, for example, hence the budget buy. I received the No7 Skin Illuminator as part of a deal (there’s a ‘free gift’ deal on similar to this one right now when you buy two No7 products at Boots!) , when I purchased No7 Shine-free Primer (£12.50) and No7 Precision Lip Pencil (£6.75). And finally, the mini Benefit highlighters are out of my Party Poppers advent calendar, which my WONDERFUL mother bought for me as a treat (she keeps moaning that I haven’t posted about it yet, so I thought I’d treat her to a mention).

My Highlighter Collection
The Line Up
So, here we have it! First of all, let’s talk about packaging (as this is what usually draws me into a product), never mind all that “don’t judge a book by it’s cover” stuff…

I don’t love the No7 ‘tube’, to be honest; I’m very weary of tubes, because in the past they’ve had a tendency to explode on me, also, I think it makes the product look much cheaper than it actually is (£11). Don’t forget that tubes can be a right pain in the backside to get the right amount of product out of too! Onto MUA, a similar packaging to MAC Skin finish, slightly flimsier, but what do you expect for a £20 price difference?! Simple but sophisticated, in my opinion, this product doesn’t look cheap whatsoever. Next, Watts Up by Benefit –  classically humorous with illustrations of bulbs all over the lipstick-like casing. In my eyes, the strong packaging is very suitable for the solid, but creamy highlighter inside and allows quick and easy application. MAC, oh MAC, how I love you… The matte black casing is just so sophisticated and, for me, simplicity is the key – the only thing better than MAC packaging is MAC special edition packaging! (Think Alluring Aquatics collection.) Finally, High Beam, I’m not really a fan of the brush “nail-polish”-like applicator, as it makes it difficult to apply the same amount of product each time you use it, but the packaging itself is OK. I know that Benefit products are meant to look fun on the outside, but sometimes, like this, they look a bit like a seven-year-old’s first cosmetics kit.


Highlighter Swatches

Swatches: From the bottom, No7 Skin Illuminator Radiance Boosting Beauty Fluid (£11.00), MAC Mineralize Skinfinish in Soft and Gentle (£24.00), MUA Undress Your Skin Highlighting Powder (£3.00), Benefit High Beam Highlighter (£19.50), Benefit Watts Up Highlighter (£24.50).


Onto the actual product, wahey, first in line is No7 Skin Illuminator in Peach. This is recommended to be used underneath foundation for a ‘perfectly healthy glow’ or on top for a little highlight, personally, I think it’s a little too shimmery for under foundation, especially for us combination/oily skinned girls. In shade ‘peach’, this has a lovely golden colour and being a creamy liquid highlighter, it’s super easy to blend out. It’s staying power isn’t amazing, but if this is what you want, I would recommend using a powder highlighter anyway. Wonderful for warm undertones and more tanned, beigey skin tones, but for me, this isn’t great.

Next up is MAC Mineralize Skinfinish in Soft and Gentle, which is my most recent purchase out of the lot. For the hefty price tag, I don’t expect good things, no, I expect bloody miraculous things! Thankfully, miraculous things is just what it’s given me!  Soft and Gentle is by far my favourite at the moment; it gives you a radiant sparkle and adds glam to even the most natural of looks without looking out of place. Without realising when I bought it, one of my best friends actually adores this product too – using it for cheekbone definition (not that she needs it, that gal has cheek bones of a goddess). I’m amazed at how this shade truly suits any skin tone, and with my skin being so pale, this adds a very subtle hint of colour to my complexion too – which is nice in winter time.

Oooh, time for the bargain buy – it’s only MUA’s Undress Your Skin Highlighting Powder! At just £3, the pigmentation of this product, although obviously not as good as the likes of MAC and Hourglass, is unreal! The sparkle-factor of this is just as high as any other luxury brand highlighter; my only dislike is the baby-pink colour of this – it’s not very easy to blend into foundation and can make the highlight look a bit obvious. But, seeing as I love everything else about the MUA highlighter and the quality is such good value for money, I’m definitely up trying this in other shades!

Now, onto Benefit High Beam, a widely adored highlighter. I think this is because, like Soft and Gentle, it suits any skin tone, no matter how fair or dark you are. The thing about this highlighter, is that it’s very VERY subtle thanks to it’s liquid consistency; some people love this, some people hate this. Me? I love it. I would advise wearing this over BB/CC creams and tinted moisturisers to go with the natural and youthful glow it gives.

And finally, let’s talk about Watts Up… (get it?!) In the packaging it appears to be a very quick and easy way of applying highlighter, just like Clinique Chubby Stick Highlighter (£19.00) and Kiko (a brand you MUST try!) Radiant Touch Creamy Stick Highlighter (£8.50), but upon application, I discovered that this is pretty hard to blend in due to it’s solid consistency. Additionally, the heavy bronze tone of this highlighter is way too orange for me, especially when it’s difficult to blend out – this would be best for darker or more tanned skin tones, in my opinion. Probably one of those products that I’ll just have to pass on to my less ghostly friends…


What are your favourite highlighters on the market? I need some advice as to what to add to my collection next! Let me know below…

Emilia x

Day-time Make-up Look with Rimmel Lasting Finish Nude Foundation

Night-time make-up is easy in my opinion; it’s a sort of ‘slap everything that you own on your face’ concept. All out on eyes, all out on lips – who cares? But, day-time make-up, on the other hand can be a bit of an issue for those less-educated in the beauty world. You don’t want to look too bare-faced, but you also don’t want to look like you’re going to the club when you’re really just going for a coffee. Alas, no fear, my little make-up queens and kings, I’m here to save the day, along with a little help from the love of my life (that would be my Rimmel Lasting Finish Nude Foundation). Let’s get started!

Screen Shot 2015-11-07 at 16.22.29

As promised, I will delve into the foundation a little more than the other aspects of this look, because, honestly, it’s extremely rare to find a drugstore foundation that does such a good job, in my opinion. So, above you can see me with literally just the Rimmel Lasting Finish Nude Foundation (£7.99) on; I wear shade 100 Ivory, which is astonishing because it’s actually not the lightest shade and I am GHOSTLY pale in winter! I use the original foundation, without the comfort serum, but, in all honesty, my skin is the most sensitive thing ever and the non-comfort serum foundation doesn’t cause me any hassle whatsoever.  However, I do not use this for everyday use, as my complexion simply isn’t a fan of make-up and dries out really quickly with over-use of products that are too heavy for me. My everyday go to is bareMinerals Complexion Rescue in Vanilla (£26), as it hydrates amazingly, but for when I need a little more coverage  and a little more matte-ness, I always reach for my Rimmel foundation (which is about 1/3 of the price as well!). Talking of matte quality, this foundation combats shiny areas, but does not look cakey in the slightest; your natural glow is allowed through this foundation, which I love. The foundation itself is a liquid consistency, less of a cream unlike Complexion Rescue, and blends out AMAZINGLY with the use of Real Techniques Expert Face Brush (£9.99). Finally, just as it says on the tin, this foundation can LITERALLY last all day – incredible. So many bloggers and vloggers alike have been astonished by the fact that this foundation actually sticks to it’s promises; many have praised it for staying put, even through sports.

Here’s the final look! Let me take you through what products I’ve been using…

Foremost, the base, as we know, is Rimmel Lasting Finish Nude Foundation in Ivory 100 (£7.99). I’ve added to this, a little MAC Select Moisturecover in  NW15 (£15.50) under the eyes, down the centre of my nose, on my chin and on my brow-bones.  I guess I use it as a sort of ‘highlighter’ rather than a way to hide blemishes; I much prefer to use Estée Lauder Double Wear Foundation in Ecru  (£30.00) for this purpose. (I desperately need to invest in a cream concealer! Someone help!) Using the Real Techniques Detailer Brush, MAC 195 Concealer Brush (£20.00) and Real Techniques Expert Face Brush (£9.99) to blend in my concealer enables it to perfectly blend with my slightly darker foundation. Then, using Real Techniques Contour Brush from the Core Collection (£20.99) and the Sculpting Brush (£9.99),  I applied my contour, NYX HD Blush in Taupe ($6.50) under my cheekbones, around my temple and down both sides of my nose. To further ‘sculpt’ my face, I proceeded to apply MUA Undress Your Skin Highlighter (£3.00) to the inner corner of my eyes, my cupid’s bow, down the centre of my nose and just above my cheekbones.

Onto the eyes, I’ve used my new MAC Amber Times Nine Palette (£30.00), which I absolutely adore along with the Naked 2 shade from my Naked Basics Palette (£23.00) for contouring the eyes. Do any of you own the Naked 2 Basics Palette? I love the look of the cool-toned shades, but am yet to try it! Anyways, the shades used from Amber Times Nine are shown below; this was applied using the Base Shadow Brush and Deluxe Crease Brush from the Real Techniques Starter Set (£21.99). Following the tip which I was given recently, I then set my eyeshadow with my Clinique Blended Face Powder in Invisible (£23.50) before lining my top-lid with a thin flick of L’Oreal Superliner Perfect Slim Black Intense (£6.99). Next, using my little exclusive tester of Benefit They’re Real Tinted Lash Primer (thank you Elle!) along with the stunning Benefit Rollerlash (£19.50), I created a wonderfully separated and curled lash-look. Finally, to ‘frame my face’ I brushed my eyebrows with Miss Sporty Just Clear Mascara (£2.99) before filling them in with MAC Brow Pencil in Lingering (£14.00).

IMG_2639

Finally, onto lips! I decided to keep it simple for the day-time look, I used a corally pink shade called Nude Pink (No.05) from the Burberry Kisses Lipstick Collection (£25.00) along with my MAC Lip Pencil in Subculture (£12.50). It gives a glossy finish and a light hint of pink, which compliments pale skin really nicely.

I hope I’ve inspired you to get playing around with your make-up collections! What’s your opinion on the products I’ve used for this look? Let me know in the comments!

Emilia x

My Real Techniques Collection

Make-up brushes can literally be the maker or breaker of your make-up; even the best of products look bad when applied incorrectly! As the realisation of the importance of the make-up tools we use has dawned on us ladies, more and more brands have arisen. Sigma, Morphe, MAC, Eco-tools – most beauty stores and brands even have their own collections now because we just can’t get enough! Personally, I opt for the extremely well known high-street brand, Real Techniques, which is what today’s post is entirely about. Real Techniques brushes may not be quite as high quality as other brushes like Sigma/MAC in terms of bristles, but for me they are the perfect compromise – because what 16 year old can really afford to spend £20 per brush for an entire collection? Instead, I’ve opted for just a few higher end foundation brushes (MAC) because the base is the most complicated and important part for me, and then a larger collection of mid-market Real Techniques brushes. But, somehow I always end up needing to add “JUST ONE MORE BRUSH!” to the family that lurks in my makeup drawers… It’s a thing that many of us make-up addicts suffer from. Anyways, onto my collection!

IMG_2589

Okay, so here it is, all laid out for you! As I said, not massive but, don’t you worry it’s still growing. The orange brushes you can see are all designed for the base, pink are for ‘finishing touches’ as such and purple are for the eyes/brows. The only colour that I don’t own is the Bold Metals metallic brushes (there’s a deal on the set to save £34 at Boots at the moment by the way – just click the link I’ve attached!) – they’re a teeny bit more expensive and my bank balance can’t quite support this just yet! Now, I’ll zoom in to each colour collection and no doubt natter on about everything possible there is to do with each brush… Excuse any babbling!

Let’s start with the piddly collection – the ‘finishing’ type brushes as I would name them. Brushes that are part of this collection include kabuki brushes, stippling brushes, setting brushes and sculpting brushes. Brushes for the final touches to your look. After discovering the wonders of contouring thanks to the ever-evolving world of beauty, I decided to ask for a brush specifically for this purpose as part of my birthday wish list. This was the Real Techniques Sculpting Brush, which can be seen on the right in the first picture above. It has short fibres for accuracy and an angled characteristic to help you apply your contour right under the cheekbones (where it should be). I have to say, I’m loving it so far and it does the job much better than my Real Techniques Retractable Kabuki brush (seen to the left of the sculpting brush) did. Instead, I like the use the kabuki brush for highlighting (I use MUA Undress Your Skin Highlighting Powder) or blending in my contour (NYX HD Blush in Taupe)  to achieve a natural finish. The only issue I have with these two RT brushes, in particular, is that they’re not really soft enough for my ever-so-sensitive skin. But, if I had to choose between one of these, I would certainly choose the sculpting brush.

Onto the face brushes, my favourites! From left to right you can see, Expert Face Brush, Contour Brush, Pointed Foundation Brush and Detailer Brush (these three are part of the Core Collection set). Firstly, the Expert Face Brush, the newest to my collection; it’s often raved about by the blogging and vlogging communities and after using it I CAN TOTALLY SEE WHY! Honestly, with this brush there is 0% chance of your base being streaky – it blends to perfection! I use this after my MAC Keepsakes Collection Foundation Brushes to ensure evenness and also to blend in blush/contour. Next, the so-called ‘Contour Brush’, as part of the core collection, this actually does a rubbish job at applying contour. It’s good for blending out contour in circular motions, but I would’t say it’s an essential. The Pointed Foundation Brush I also don’t love, but those who prefer a heavier foundation probably would. The issue with this is that it leaved my complexion very streaky if I use it to apply light products and the less streaks the better, isn’t that right girls? Finally, a brush that I actually adore. The Detailer Brush can be used for lipstick or concealer; I prefer concealing with it, personally. It’s so small and great for completely hiding even monster blemishes – I use it with my MAC Select Moisturecover Concealer in NW15.

IMG_2590

Lastly, onto the eye brushes – this is the Real Techniques Eye Make-up Brush Starter Set. It includes (from top to bottom) an angled eyebrow brush, a shadow detailing brush, a smudged brush, a blending brush and a shading brush. My personal favourites are the angled brow brush, which I use to tame and shape my brows along with Miss Sporty Just Clear Mascara and the blending brush for transitioning shades. However, I feel like my eye-brushes collection is the one that needs work on it the most. I’m not great with eyeshadow and it never seems to go how intended – I’m wondering whether this is because I don’t use a primer or because I need some different brushes? What do you think?

Have you tried any of these brushes? Are there particular ones that you love/hate? Any brush brand/type recommendations for me? Let me know below in the comments!

Emilia x

p.s. If you’re a beauty and/or fashion lover like myself, make sure to enter my giveaway right here!